The Ultimate Beginner’s Guide to Gel Nail Tech Must-Haves: Start Your Journey with Confidence
- sairamunsif

- Jun 25, 2025
- 6 min read
Updated: Jun 30, 2025

Starting your journey as a gel nail specialist is exciting, but it can also feel like stepping into a world of endless tools, techniques, and decisions. As a beginner, you want to create stunning, long-lasting gel manicures that keep clients coming back, but where do you begin? The key is building a high-quality, beginner-friendly nail tech kit without overwhelming your budget or workspace.
This guide breaks down the must-have tools and essentials for aspiring gel nail techs, optimized for both performance and practicality. Plus, we’ll share how Aaliyah Beauty Bar’s Hybrid Nail Tech Program can fast-track your skills with hands-on training and expert guidance. Whether you’re dreaming of creating Instagram-worthy nail art or mastering flawless gel applications, this article is your roadmap to success.
What Does a Gel Nail Specialist Do?
A gel nail specialist is a professional who specializes in applying durable, glossy gel manicures that last 2–3 weeks. Unlike traditional polish, gel polish is cured under a UV or LED lamp, creating a chip-resistant, high-shine finish that clients love. As a gel nail tech, your tasks include:
Prepping nails (cleaning, shaping, and cuticle care)
Applying base coats, gel polish, and top coats
Curing polish under a lamp
Creating nail art or designs (optional)
Providing nail repair or maintenance services
To excel, you’ll need precision, creativity, and the right tools. Don’t worry if you’re just starting out — with the essentials listed below and proper training, you’ll be ready to impress clients in no time.
Why Invest in the Right Tools?
Using high-quality tools ensures your gel manicures look professional, last longer, and keep your clients’ nails healthy. Low-quality products or improper techniques can lead to peeling polish, uneven finishes, or even nail damage. By starting with the right essentials, you’ll build confidence, avoid costly mistakes, and create a loyal client base.
The good news? You don’t need to buy everything at once. A focused, high-quality starter kit is enough to get you going. Let’s dive into the must-haves for your beginner gel nail tech kit.
The Essential Gel Nail Tech Starter Kit
1. Tools for Nail Prep & Sanitation
Proper nail prep is the foundation of every flawless gel manicure. Clean, well-prepped nails ensure better polish adhesion and a professional finish. Here’s what you need:
Nail Clippers: Trim nails to the desired length. Look for stainless steel clippers for durability.
Nail Files (180/100 Grit): Use 180-grit for shaping and 100-grit for smoothing. Avoid overly coarse files to prevent nail damage.
Buffing Blocks: Gently buff the nail surface to remove shine and improve gel adhesion.
Cuticle Pushers and Nippers: Push back cuticles and trim excess skin for a clean nail bed. Opt for stainless steel for easy sanitization.
Alcohol Spray or Sanitizer: Disinfect nails before polish application and sanitize tools between clients.
Pro Tip: Always sanitize your tools before and after each client to maintain hygiene and build trust. Consider a UV sterilizer for an extra layer of cleanliness.
2. Base & Application Essentials
The heart of your gel manicure kit lies in the products you use for application. Start with these basics:
Base Coat and Top Coat: A high-quality base coat ensures gel polish adheres properly, while a top coat seals the look with a glossy or matte finish. Brands like Gelish or Modelones are beginner-friendly and reliable.
Gel Polish (5–10 Colors): Begin with versatile shades like nudes, reds, pinks, and a classic black or white. These are client favorites and great for mixing nail art designs.
Nail Brushes: Fine-tipped brushes are essential for precise application, especially for nail art or detailed work.
Pro Tip: Invest in a no-wipe top coat to save time and achieve a smooth, glossy finish without extra cleanup.
3. UV/LED Curing Lamp
Gel polish requires curing under a UV or LED lamp to harden and set. Here’s what to look for:
Wattage: Choose a lamp with at least 48 watts for efficient curing.
UV vs. LED: LED lamps cure faster (30–60 seconds per layer) and are more energy-efficient. UV lamps are more affordable but take longer (2–3 minutes per layer).
Timer Settings: Look for lamps with preset timers (30s, 60s, 90s) for ease of use.
Recommended Brands: SUNUV or MelodySusie offer reliable, budget-friendly options available on Amazon or at beauty supply stores.
Pro Tip: Always follow the manufacturer’s curing time recommendations to avoid under- or over-curing, which can cause peeling or wrinkling.
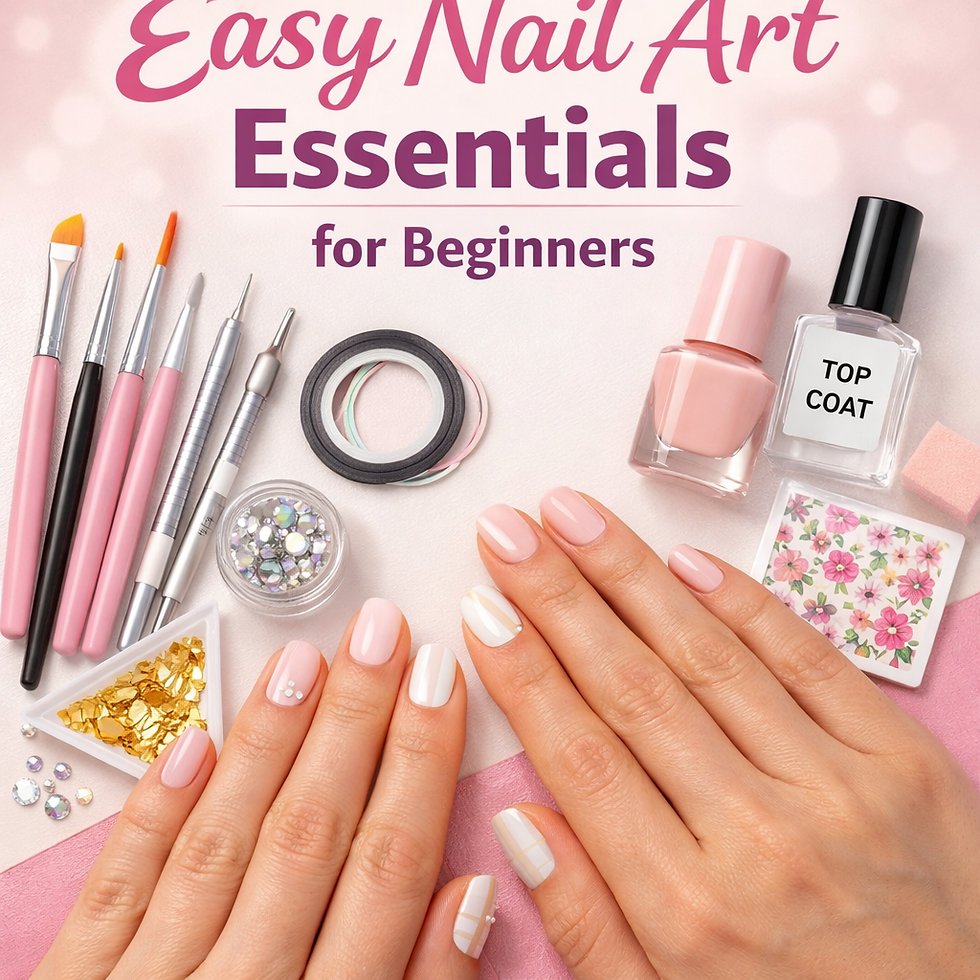
4. Nail Art Tools (Optional but Creative)
Want to wow your clients with unique designs? Nail art tools let you add flair to your services. Consider:
Dotting Tools: Create perfect polka dots or intricate patterns.
Fine Striping Brushes: Ideal for lines, swirls, or geometric designs.
Rhinestones, Glitter, and Foils: Add sparkle and texture for eye-catching looks.
While not essential for beginners, nail art tools help you stand out and attract clients who love custom designs.
5. Desk Setup for Comfort and Efficiency
A well-organized workspace boosts your productivity and creates a professional vibe. Set up your nail station with:
Ergonomic Nail Desk and Chair: Choose a desk with enough surface area for tools and a comfy chair to reduce strain during long sessions.
Daylight LED Lamp: Bright, natural lighting helps you see details clearly and ensures accurate color application.
Storage Drawer or Tray: Keep tools organized and within reach to streamline your workflow.
Pro Tip: Add a small plant or decor to make your space inviting for clients.
6. Hygiene, Safety, and Client Comfort
A clean, safe environment is non-negotiable. Protect yourself and your clients with:
Face Masks and Gloves: Wear disposable gloves during services and masks when working with dust or strong chemicals.
Disposable Towels or Table Covers: Use fresh covers for each client to maintain hygiene.
Nail Dust Collector: Optional but highly recommended if you use an electric drill to reduce airborne dust.
Pro Tip: Invest in a small air purifier for your workspace to keep the air fresh and free of chemical fumes.
7. Smart Add-Ons to Level Up Your Skills
As you gain experience, these extras can enhance your services and efficiency:
Electric Nail Drill: Speeds up nail prep and removal but requires practice to avoid damaging natural nails.
Practice Hand: Perfect for honing your skills at home without needing a live model.
Client Tracking Book: Record client preferences, allergies, or favorite colors to personalize their experience and build loyalty.
Where to Buy Your Gel Nail Tech Starter Kit
To help you shop smart, here’s a table of recommended brands and retailers for your beginner kit:
Item | Recommended Brands | Where to Buy |
Gel Polish | Beetles, Kiara Sky | Amazon, Local Beauty Supply Stores |
UV/LED Lamp | SUNUV, MelodySusie | Amazon, Nail Supply Stores |
Base & Top Coat | Modelones, Gelish | Walmart, Online Retailers |
Nail Brushes | PANA, Makartt | Amazon, Beauty Supply Stores |
Cuticle Tools | Revlon, Tweezerman | CVS, Walgreens, Amazon |
Pro Tip: Start with mid-range brands to balance quality and cost. Avoid super cheap products, as they often lead to poor results and frustrated clients.
Common Beginner Mistakes to Avoid
As a new gel nail tech, steering clear of these pitfalls will save you time, money, and stress:
Skipping Nail Prep: Failing to clean, file, or buff nails properly reduces polish adhesion, leading to lifting or peeling.
Applying Thick Layers: Thick polish layers don’t cure evenly and can look bulky or peel off.
Under- or Over-Curing: Follow curing time guidelines to avoid sticky or brittle finishes.
Using Low-Quality Tools: Cheap tools break easily and can harm nails or produce sloppy results.
Neglecting Sanitation: Always sanitize your station and tools to prevent infections and maintain client trust.
By focusing on proper techniques and hygiene, you’ll deliver consistent, professional results.
How Aaliyah Beauty Bar Sets You Up for Success
Ready to take your skills to the next level? Aaliyah Beauty Bar’s Hybrid Nail Tech Program combines the flexibility of online learning with hands-on training to help you master gel manicures faster. Here’s what you’ll learn:
Gel Polish Application: Perfect your technique for smooth, long-lasting manicures.
Nail Shaping and Design: Create flattering nail shapes and eye-catching designs.
Client Care and Safety: Build trust with professional hygiene and communication skills.
Whether you’re in Georgia or learning remotely, our expert instructors provide personalized feedback to ensure you’re ready to launch your career. With our program, you’ll gain the confidence and skills to stand out in the competitive nail industry.
Start Your Gel Nail Tech Journey Today
Becoming a gel nail specialist is an exciting, creative, and rewarding career path. By investing in the right tools and training, you’ll be well-equipped to create stunning manicures that keep clients coming back. Use this guide to build your beginner kit with confidence, and don’t feel pressured to buy everything at once — start small, focus on quality, and grow as you gain experience.
Ready to accelerate your learning? Join Aaliyah Beauty Bar’s Hybrid Nail Tech Program to master gel techniques, nail art, and client care. You’re not just learning nails — you’re building a future filled with creativity and opportunity. Get started today and let your nail tech journey begin!
Ready to shine? Enroll now at Aaliyah Beauty Bar and take the first step toward your dream career!
This guide is designed to help beginners build a gel nail tech kit with confidence. For more tips, tutorials, and training, follow Aaliyah Beauty Bar on Instagram or visit our website for exclusive resources.


Comments